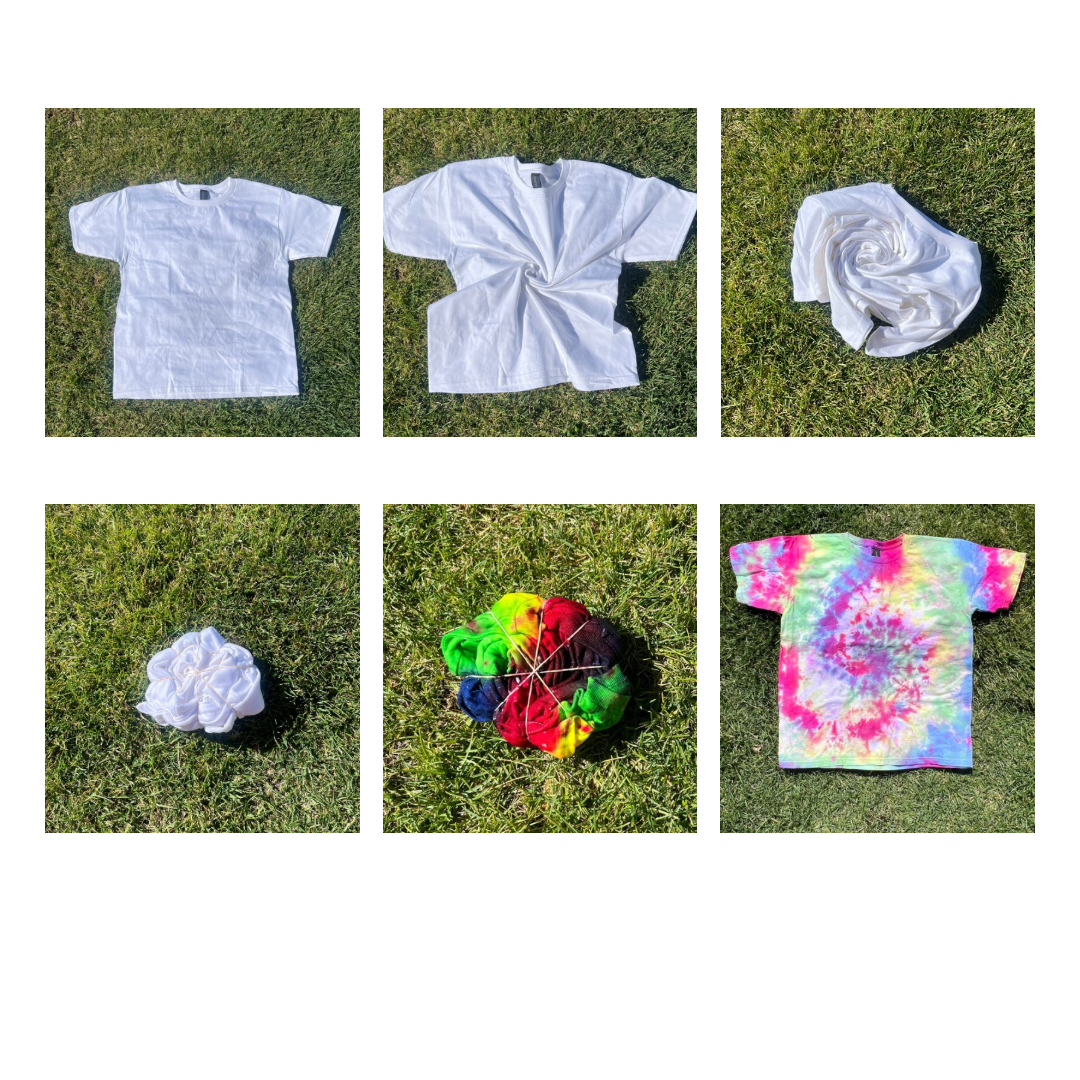
Spiral
Find the Center Point
Lay the shirt flat on a protected surface.
Decide where you want the spiral center (usually the middle, but you can choose off-center for a unique look).
Create the Spiral
Pinch the fabric at your chosen center point.
Twist the fabric in a circular motion, spiraling it tightly into a disk shape.
Keep twisting until the entire shirt is in a flat, round.
Secure with Rubber Bands
Wrap 3–4 rubber bands around the shirt, crossing them so it’s divided into 6–8 wedges (like pizza slices).
Apply the Dye.
Wearing gloves, apply different colors to each wedge using squeeze bottles.
Flip the shirt and repeat on the other side.
Make sure the dye penetrates the folds for vibrant color.
Tip: Leave some white space for contrast.
Set the Dye.
Place the dyed shirt in a plastic bag (to keep it damp).
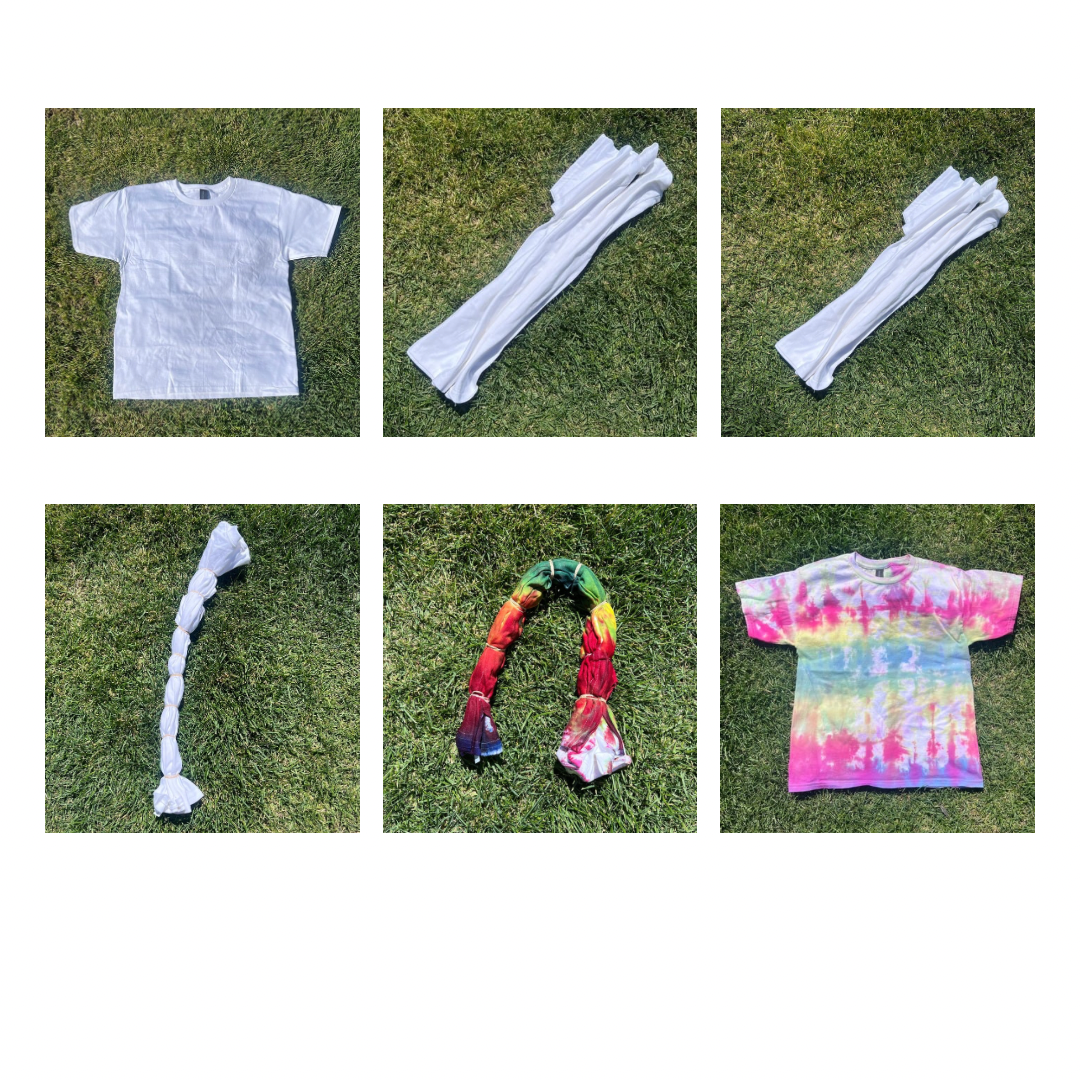
Straight Lines
Lay the shirt flat on a smooth surface.
Accordion fold it: Start at the bottom and fold upward in even pleats (about 1–2 inches wide).
Keep edges lined up for crisp lines.
Secure with rubber bands evenly spaced along the folded shirt (like a stack).
Apply Dye
Decide if you want horizontal, vertical, or diagonal lines (this depends on your fold direction).
Apply different dye colors between the rubber band sections. Alternate colors for a striped effect.
Make sure to saturate each section, but don’t over-saturate if you want crisp white lines.
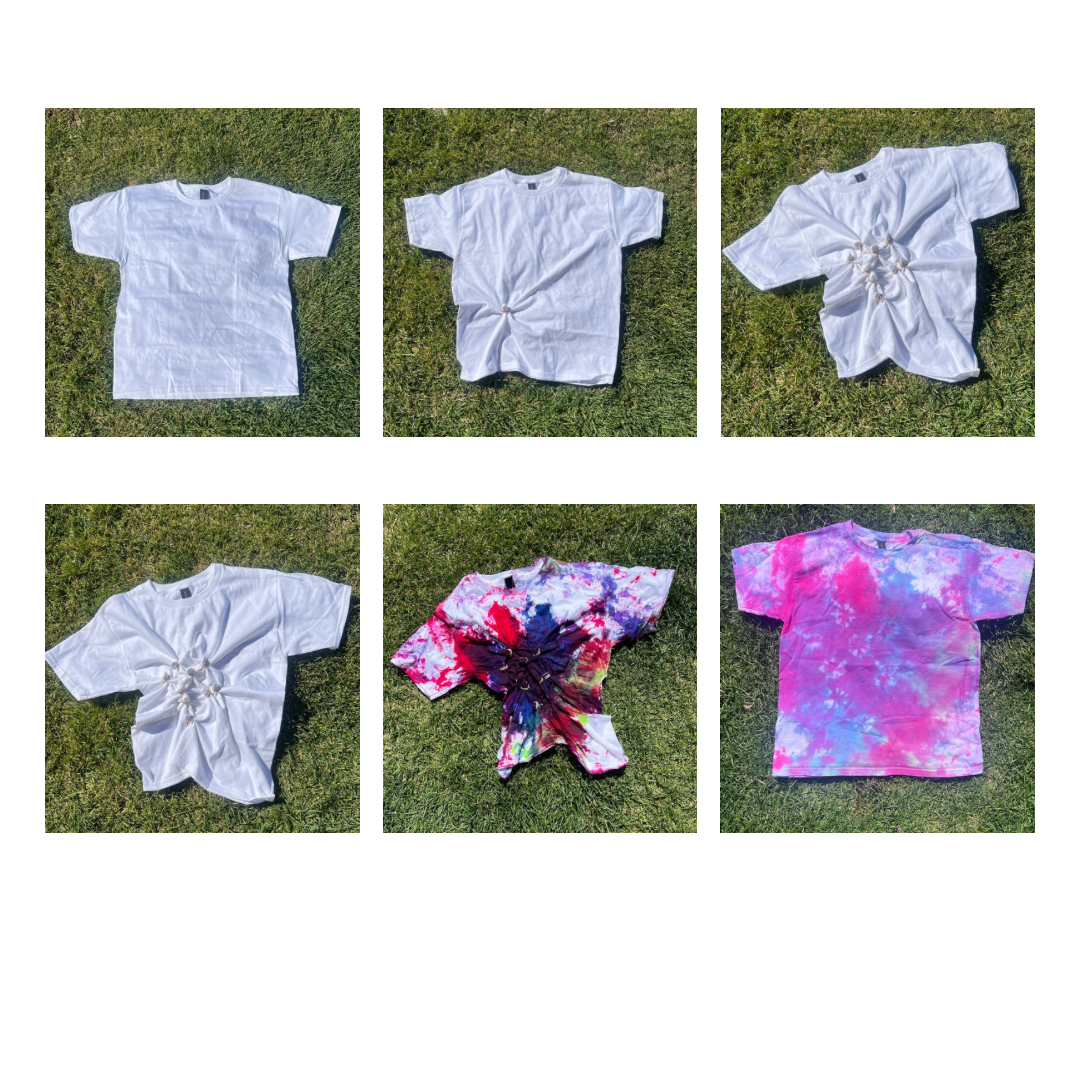
Starburst
Create the Starbursts
Pinch small sections of fabric where you want a starburst.
Pull each section up into a small cone shape.
Wrap a rubber band around the tip of each cone (like tying off little points).
Repeat this in several spots on the shirt for multiple bursts.
Apply the Dye
Put on gloves.
Apply one color to the tips of the small tied sections for the burst centers.
Add different colors around the tied sections for rings.
Leave some white space for contrast, or blend colors for a rainbow effect.